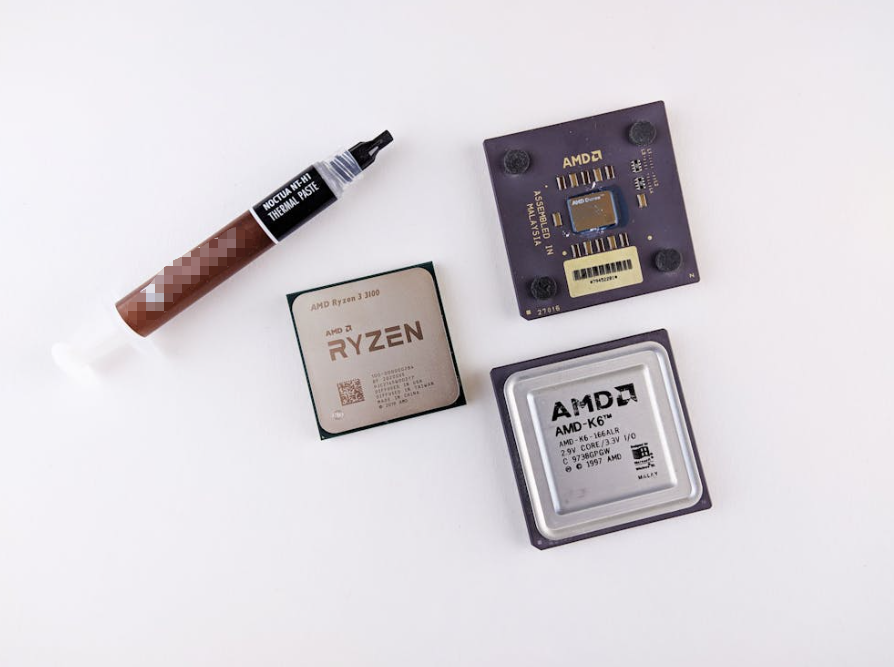
Thermal grease — also known as thermal paste, thermal compound, or conductive silicone grease — is a cornerstone material in modern heat dissipation technology. In industries from computing to power electronics, from aerospace applications to consumer devices, effective thermal management determines performance, reliability, and longevity of sensitive components. Yet despite its ubiquity, many engineers and technicians still underestimate how thermal grease works and how proper application dramatically affects heat transfer outcomes.

This comprehensive guide covers both the science behind thermal grease and the practical techniques for applying it correctly. Whether you’re a seasoned engineer, a system integrator, or just expanding your thermal management knowledge, you’ll find actionable insights and expert tips grounded in real‑world practices.
What Is Thermal Grease and How It Works
At its core, thermal grease is a thermally conductive interface material (TIM) designed to bridge microscopic gaps between two solid surfaces — usually a heat source (like a CPU, GPU, power module, or LED base) and a heat sink or cooling plate.
Even when two metal surfaces appear smooth to the naked eye, their microscopic texture contains peaks, valleys, and air pockets. Air is a poor conductor of heat, so these tiny voids interrupt efficient heat transfer. Thermal grease fills those gaps, displacing air and creating continuous thermal pathways that bridge the interface.
In practical engineering terms:
- Thermal grease enhances heat conduction by minimizing “thermal resistance” between mating surfaces. It replaces air (low thermal conductivity) with conductive material, enabling heat to flow more freely to the heat sink.
- Materials used in high‑performance greases range from silicone‑based carriers with ceramic fillers to metal‑enhanced or even graphene‑infused composites that push the limits of conductivity.
Different formulations affect performance characteristics, such as:
- Silicone‑based compounds – common and easy to use.
- Ceramic‑enhanced pastes – electrically non‑conductive and reliable.
- Metal‑based formulas (e.g., silver) – excellent conductivity but require care to avoid electrical shorts.
From data centers to industrial power modules, the right compound ensures thermal energy flows where you want it — not where you don’t.
Why Correct Application Matters
Although thermal grease is often sold as a simple solution to optimize heat transfer, its application technique can make or break overall system performance.

Here’s why:
Too Much Grease: A heavy blob squeezed between components will not improve conduction. Excess paste can act as a thermal insulator if its layer becomes too thick. It may also spill over onto adjacent electronics — especially if the compound is electrically conductive.
Too Little Grease: Insufficient paste leaves voids and air pockets that trap heat rather than conduct it away. This can increase hot spots and lead to component throttling or failure.
Uneven Distribution: If the compound isn’t distributed across the contact surface, only portions of the interface will efficiently conduct heat, reducing the effectiveness of your cooling solution.
In short, application technique influences interface thermal resistance — a fundamental parameter in thermal engineering.
Preparing for Thermal Grease Application
Before you even think about spreading or dotting grease on your device, attention to preparation sets the stage for success.
Work in a Clean, Static‑Safe Environment
Contaminants such as dust, oil from fingerprints, or lint left by tissues can interfere with thermal contact and reduce conductivity. Use a clean, well‑lit workspace and consider an anti‑static wrist strap if you’re working with sensitive electronics.
Remove Old Compound Completely
Old, dried paste cannot conduct heat effectively and will trap air. Use 90–99% isopropyl alcohol and a lint‑free cloth to remove residue from both the heat sink and the device surface. Rinse in circular motions until all old grease is gone and let the surfaces dry completely.
Inspect Mating Surfaces
Look for scratches, warping, or damage. Minor surface roughness is usually fine, but deep gouges can create thermal bottlenecks. Address these issues before applying new grease.
Proven Thermal Grease Application Techniques
There’s no single “perfect” method that suits every scenario. Instead, several industry‑accepted techniques are used depending on the component size, thermal paste viscosity, and cooling solution design.
Here’s a breakdown of the most effective methods:
The Pea‑Sized Dot Method
This is the most widely recommended technique for CPUs and many mid‑sized chips:
- Squeeze out a small dot (about 4–5 mm in diameter) in the center of the chip’s surface.
- When the heatsink is reinstalled, even pressure spreads the grease outward to cover the interface.
Advantages:
- Simple and quick.
- Minimal risk of air pockets when done correctly.
Best For:
- Desktop CPUs, most embedded processors, and small‑ to mid‑sized surfaces.
Line or Cross Pattern
For elongated or larger die surfaces (like high‑end CPUs or GPUs), some technicians apply:
- A thin line across the chip, or
- An X/cross pattern laid diagonally.
This encourages more uniform distribution under pressure without excessive thickness.
Advantages:
- Better coverage on large chips.
- Can reduce edge gaps where heat may build up.
Best For:
- GPUs, server CPUs, high‑TDP solutions.
Full Spread Method
With this method, the technician uses a dedicated plastic spreader or applicator tool to manually spread a thin film across the entire interface before mounting.
Advantages:
- Guarantees coverage.
- Useful when paste doesn’t flow easily.
Disadvantages:
- Takes more time.
- Can trap air bubbles if not done carefully.
Best For:
- Thick or viscous greases.
- Situations where custom coverage is critical.
Reinstalling the Cooling Solution
Once the thermal grease is in place:
- Lower the heatsink straight down onto the surface to avoid smearing.
- Use an even tightening pattern — such as a diagonal cross — to ensure uniform pressure across the interface.
- Avoid overtightening fasteners. Excess torque can warp components or squeeze paste out of the effective zone.
- After installation, visually inspect the edges to ensure no overflow onto nearby sensitive parts.
Common Application Mistakes to Avoid
Despite simple procedures, certain errors frequently undermine thermal performance:
Using Too Much Compound
More isn’t better. Watch out especially with electrically conductive metal pastes, as excess can run onto unintended surfaces.
Risque Manual Spreading with Fingers
Never spread thermal grease with bare fingers — oils from skin contaminate the interface and reduce thermal performance. Always use tools or let mechanical pressure handle the distribution.
Reusing Old Paste
Old paste dries out over time and loses effectiveness. Clean and reapply fresh compound whenever you disassemble the interface.
Ignoring Monitoring After Installation
Once installed, it’s good practice to check operational temperatures using thermal monitoring software or embedded sensors to confirm the cooling solution is performing as intended.
Long‑Term Performance and Maintenance
Thermal grease isn’t permanent. Over time, repeated heating cycles can cause “pump‑out,” separation, or drying — which increases interface resistance and elevates operating temperatures. Some general guidelines:
- Replace thermal grease every 2–3 years for high‑performance systems, or sooner if temperatures rise inexplicably.
- OEM applied grease is often adequate for stock systems, but high‑TDP applications benefit from premium compounds.
- Store unused grease in a cool, sealed environment to preserve its properties.
Proper lifecycle management ensures a reliable thermal budget over years of operation.
Choosing the Right Thermal Grease for Your Needs
Selecting a compound is as important as how you apply it. Consider:
- Thermal conductivity rating — typically measured in W/mK. Higher is better for demanding applications.
- Electrical conductivity — non‑conductive greases are safer for electronics.
- Viscosity — lower viscosity can be easier to spread but may need careful handling.
A professional supplier like HakTak offers a range of thermally conductive materials formulated to balance performance, safety, and ease of application.
Conclusion
Understanding how thermal grease works and mastering its application are critical skills in thermal engineering. Whether you’re building high‑performance computing systems, integrating industrial power modules, or designing compact consumer electronics, the interface between heat source and heat sink plays a defining role in system reliability and performance.
Applying the right amount of compound, using proven methods, preparing the interface surfaces properly, and monitoring performance over time will consistently yield better thermal results. Mastery of these techniques delivers a real advantage — one that keeps devices running cooler, safer, and longer.
Frequently Asked Questions (FAQs)
Q1: How much thermal grease should I apply?
A: A small pea‑sized amount at the center is usually sufficient — too much can hinder heat transfer.
Q2: Can I reuse old thermal paste?
A: It’s best to clean off old paste and apply fresh compound — reused paste often traps air and loses conductivity.
Q3: Is manual spreading with a finger recommended?
A: No — skin oils contaminate the surface. Use a tool or rely on cooler pressure to spread the grease.
Q4: How often should I replace thermal grease?
A: Replace every 2–3 years or whenever you remove the cooling assembly.
Q5: Does thermal grease improve performance?
A: Yes — when applied correctly, it reduces thermal resistance and stabilizes operating temperatures, improving reliability.