
Wärmeleitpads versagen in der Regel, weil der Kontakt an der Schnittstelle nicht mehr vollständig und stabil ist. Das Pad selbst kann zwar beschädigt sein, doch das ist nur eine Möglichkeit. Eine falsche Dicke, unzureichender Anpressdruck, ungeeignete Härte, ungleichmäßige Klemmung, falsche Platzierung, Verunreinigungen und langfristige Alterung können den Wärmewiderstand erhöhen.
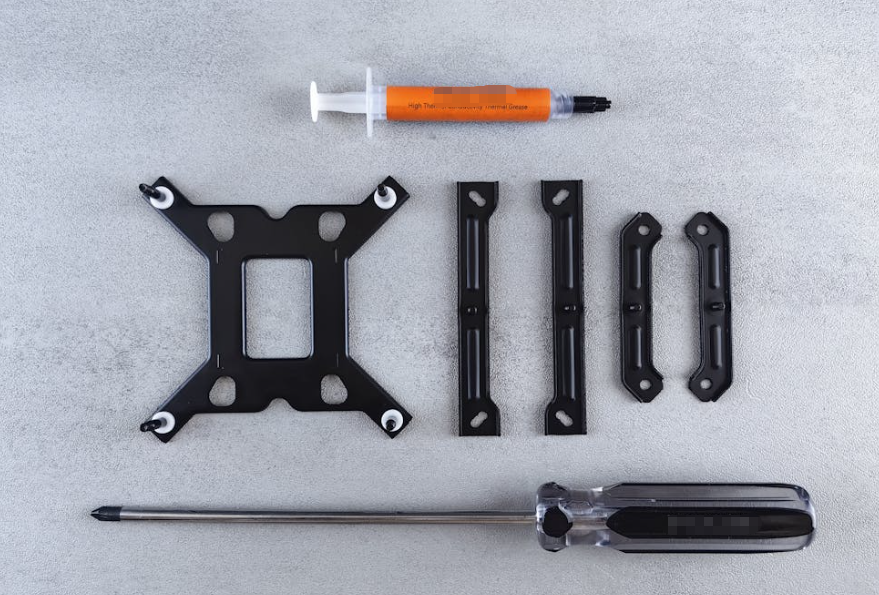
Ein höherer W/mK-Wert kann einen Luftspalt nicht ausgleichen. Er kann auch kein Kühlkörperproblem beheben, bei dem sich dieser aufgrund eines zu dicken Pads vom benachbarten Chip abgelöst hat.
Die entscheidende Frage lautet also nicht einfach: “Ist das ein schlechtes Wärmeleitpad?”, sondern:
Was hat sich auf dem gesamten Weg von der Wärmequelle über das Polster bis hin zur Kühlstruktur verändert?
Zu diesem Ablauf gehören die Bauteile, die Kontaktflächen, der Kühlkörper, das Gehäuse, die Befestigungselemente, die Toleranzen, die Betriebsumgebung und der Montageprozess. Die Fehlersuche ist am erfolgreichsten, wenn alle diese Aspekte gemeinsam überprüft werden.
Was bedeutet ein Ausfall des Wärmeleitpads eigentlich?
Ein Wärmeleitpad ist ein vorgeformtes Wärmeleitmaterial. Es füllt den Raum zwischen einer wärmeerzeugenden Komponente und einer kühleren Oberfläche, wie beispielsweise einem Kühlkörper, einer Kühlplatte, einem Metallgehäuse, einer Abschirmung oder einem Chassis.
Das Polster ersetzt eingeschlossene Luft durch ein Material, das Wärme effektiver leitet. Es kann zudem elektrische Isolierung, Dämpfung, Schwingungsdämpfung oder eine produktionsfreundliche Anordnung bieten. Das breitere Angebot von HAKTAK Leitfaden zu Wärmeleitmaterialien erläutert, wie sich Pads neben Fett, Kitt, Gelen, Phasenwechselmaterialien, Graphit und leitfähigen Klebstoffen einsetzen lassen.
Ein Ausfall bedeutet, dass die Schnittstelle eine oder mehrere erforderliche Funktionen nicht mehr erfüllt. Das bedeutet nicht zwangsläufig, dass das Pad Risse aufweist oder geschmolzen ist.
Thermischer Ausfall
Ein thermischer Ausfall kann sich wie folgt äußern:
- Erhöhte Temperatur am Übergang, am Gehäuse, im Speicher oder an einem Hotspot
- Thermische Drosselung
- Geringere Leistung
- Die Ventilatoren laufen schneller als zuvor
- Unerwartete Abschaltungen
- Ein großer Temperaturunterschied zwischen ähnlichen Geräten
- Ein lokaler Hotspot, obwohl die Durchschnittstemperatur akzeptabel erscheint
Mechanischer Ausfall
Zu den mechanischen Ausfällen können gehören:
- Extrusion des Pads aus der Schnittstelle
- Risse, Durchstiche oder Beschädigungen an den Kanten
- Dauerhafte Verformung
- Verlust der Rückstellfähigkeit nach langfristiger Kompression
- Bewegung unter Schwingung
- Biegen von Leiterplatten
- Spannung in Bauteilen oder Lötstellen
- Verformung des Kühlkörpers oder des Gehäuses
Stromausfall und Produktionsausfall
Viele Wärmeleitpads erfüllen mehr als nur eine thermische Funktion. Ein Wärmeleitpad kann zwar Wärme übertragen, aber dennoch in anderer Hinsicht die Anforderungen an die Baugruppe nicht erfüllen.
Mögliche Beispiele sind:
- Verringerte dielektrische Sicherheitsmarge nach übermäßiger Kompression
- Durchstich an einer scharfen Kante eines Bauteils
- Leitfähiger Graphit, der in der Nähe einer Schaltung freiliegt
- Verschmutzung von Kontakten, Optiken oder Schutzbeschichtungen
- Klebstoffübertragung vom Trägerpapier
- Ein Pad hat sich von seinem Zielbereich entfernt
- Eine Schutzauskleidung, die an Ort und Stelle belassen wurde
- Platzierungsabweichungen, die zu Produktionsausschuss führen
Deshalb ist die Aussage “Die Temperatur scheint in Ordnung zu sein” kein vollständiger Abnahmetest.
Symptome bei einem defekten Wärmeleitpad und was sie in der Regel bedeuten
Die folgende Tabelle dient als Anhaltspunkt und stellt keine endgültige Diagnose dar. Mehrere Fehlerursachen können dasselbe Symptom hervorrufen.
| Beobachtetes Symptom | Gruppe der wahrscheinlichen Ursachen | Erste Überprüfung |
| Die Temperatur steigt unmittelbar nach dem Austausch des Pads an | Falsche Dicke, Härte, Position oder Handhabung der Auskleidung | Abdruck des Pads und Gesamthöhe des Stapels |
| Der VRAM kühlt sich ab, der GPU-Kern wird jedoch heißer | Die Pads heben die Kühlplatte vom GPU-Chip ab | Abdruck der Kernpaste und Kompression des Polsters |
| Eine Seite eines Moduls ist heiß | Schräg stehender Kühlkörper, Verformung des Gehäuses, ungleichmäßiges Drehmoment oder unvollständige Abdeckung | Ebenheit, Befestigungsreihenfolge und Kontaktmuster |
| Die Temperaturen variieren stark zwischen den einzelnen Produktionsanlagen | Toleranz, Positionierung, Drehmoment oder Schwankungen zwischen Materialchargen | Lückenverteilung und Prozessprotokolle |
| Die Leistung lässt nach einigen Monaten nach | Druckverformungsrest, Materialalterung, chemische Beanspruchung oder Relaxation von Befestigungselementen | Alterungsdicke, Rückstellung und thermische Impedanz |
| Das Kissen quillt an den Rändern hervor | Übermäßige Dicke, Druck, Weichheit oder fehlende mechanische Anschläge | Kompression bei minimalem Spalt |
| Das Pad sieht fettig aus | Formulierungsausbluten, Wärmealterung oder Wechselwirkungen mit der Umgebung | Lieferantenbeschränkungen und Kontamination in der Umgebung |
| Es tritt ein zeitweise auftretender elektrischer Fehler auf | Durchstoß, zusammengedrückte Isolierung, Verunreinigung oder freiliegende leitfähige Kanten | Dielektrischer Weg und endgültige komprimierte Dicke |
| Die Binde bleibt beim Entfernen an der Schutzfolie kleben oder dehnt sich aus | Alterung der Folie, Klebstoffübertragung oder für den Prozess zu weiches Material | Lösekraft und Handhabungsverfahren |
Der Zeitpunkt des Auftretens des Symptoms ist aufschlussreich. Ein Problem, das unmittelbar nach der Montage auftritt, deutet in der Regel auf die Geometrie, die Pressung, die Positionierung oder die Befestigung hin. Bei einer langsamen Verschiebung sind eher Alterung, Druckverformungsrest, Vibrationen, chemische Einwirkung oder Bewegungen im Baugruppenaufbau die Ursache.
Warum eine falsche Dicke des Wärmeleitpads zu Überhitzung führt
Eine falsche Dicke ist eine der häufigsten Ursachen für den Ausfall von Wärmeleitpads. Sie führt zudem zu einigen der am schwersten zu deutenden Symptome.
Die nominelle CAD-Abweichung reicht nicht aus. Bei realen Produkten treten Abweichungen aufgrund der Höhe der Bauteile, der Lötdicke, der Verformung der Leiterplatte, der Ebenheit des Gehäuses, der Bearbeitung des Kühlkörpers, der Kompression der Dichtung und des Schraubendrehmoments auf.
Ein Pol muss bei minimalem, nominalem und maximalem Spalt funktionieren.
Was passiert, wenn ein Wärmeleitpad zu dünn ist?
Ein zu dünnes Polster berührt möglicherweise nicht beide Oberflächen. Selbst wenn es unter Nennbedingungen leicht anliegt, kann es bei maximalem Spalt den Kontakt verlieren.
Das Ergebnis kann Folgendes umfassen:
- Lufttaschen
- Schwache Kontaktstellen
- Hoher Schnittstellenwiderstand
- Lokale Hotspots
- Temperaturunterschiede zwischen den Geräten
- Zeitweise Unterbrechung des Kontakts bei Vibrationen
Dieser Defekt ist von der Seite einer Baugruppe aus oft schwer zu erkennen. Ein Kontaktpad kann scheinbar an der richtigen Stelle sitzen, obwohl es fast keinen Druck aufnimmt.
Was passiert, wenn ein Wärmeleitpad zu dick ist?
Ein dickeres Polster ist nicht automatisch sicherer. Es verlängert den Wärmeübertragungsweg und erfordert oft mehr Kraftaufwand, um die vorgesehene Dicke zu erreichen.
Ein zu dickes Polster kann:
- Erhöhung des thermischen Gesamtwiderstands
- Eine Leiterplatte biegen
- Belastung von Lötstellen oder Gehäusen
- Ein dünnes Gehäuse verformen
- An den Rändern extrudieren
- Verringerung der elektrischen Isolationsreserve nach starker Kompression
- Verhindern Sie, dass eine andere Komponente dieselbe Kühlplatte berührt
Dieser letzte Punkt wird leicht übersehen.
Angenommen, ein GPU-Kühler steht in Kontakt mit dem GPU-Chip, den Speicherchips und den Stromversorgungskomponenten. Die neuen Speicherpads sind dicker oder härter als die Originalteile. Sie sorgen zwar für einen festen Kontakt mit dem Speicher, halten die Kühlplatte jedoch etwas über dem GPU-Chip. Die Speichertemperatur kann sich dadurch verbessern, während sich die Temperaturen des GPU-Kerns und an den Hotspots deutlich verschlechtern.
Das Speichermodul scheint zu funktionieren. Die gesamte Kühlbaugruppe hingegen nicht.
Eine praktische Auswahlmethode auf der Grundlage des gesamten Spaltbereichs finden Sie im Leitfaden von HAKTAK zu Auswahl der Dicke von Wärmeleitpads für Elektronikbauteile.
Ein einfaches Beispiel zur Dicke
Angenommen, ein 1,5 mm dickes Unterlegstück wird über einen Spalt angebracht, dessen Breite zwischen 1,0 mm und 1,35 mm variiert.
| Lückenbedingung | Installierter Abstand | Pad Kompression | Mögliches Ergebnis |
| Mindestabstand | 1,00 mm | 33% | Bei einem festen Polster kann die Kraft hoch sein |
| Nennspalt | 1,20 mm | 20% | Könnte geeignet sein, sofern die Lieferantendaten dies bestätigen |
| Maximaler Abstand | 1,35 mm | 10% | Bei einigen Materialien kann der Kontakt schwach sein |
Ein und dasselbe Polster kann in einem Gerät fast überkomprimiert und in einem anderen unterkomprimiert sein. Deshalb reicht ein einziger Nennprozentsatz nicht aus.
Versagen durch Unter- und Überkompression
Wärmeleitpads müssen unter Druck an die Oberflächenstruktur angepasst werden, um eingeschlossene Luft zu verdrängen. Mehr Druck ist jedoch nicht immer besser. Es gibt einen optimalen Druckbereich.
Eine zu geringe Verdichtung führt zu versteckten Luftspalten
Eine zu geringe Kompression kann in folgenden Fällen auftreten:
- Das Polster ist zu dünn.
- Das Lager ist für die vorhandene Belastung zu hart.
- Das Schraubendrehmoment ist zu gering.
- Das Gehäuse gibt nach, anstatt das Polster zu belasten.
- Die Flächen sind geneigt.
- Die Auflagefläche ist im Verhältnis zur Gesamtklemmkraft groß.
- Die Höhen der Bauteile variieren stärker als erwartet.
Die Größe der Bremsbelagfläche verdient besondere Beachtung. Der Druck entspricht der Kraft geteilt durch die Fläche. Ein Bremsbelag, dessen Fläche sich verdoppelt, benötigt die doppelte Kraft, um denselben durchschnittlichen Druck zu erreichen, vorausgesetzt, alle anderen Bedingungen bleiben gleich.
Die Grenzfläche mag zwar sauber bedeckt aussehen, weist aber dennoch eine schlechte Oberflächenbenetzung auf.
Eine zu starke Kompression birgt mechanische und elektrische Risiken
Eine zu starke Kompression kann den Kontakt vorübergehend verbessern. Der thermische Gewinn kann nach Erreichen des vollständigen Kontakts sehr gering ausfallen, während das mechanische Risiko weiter steigt.
Mögliche Ergebnisse sind unter anderem:
- Extrusion von Polstern
- Dauerhafte Druckverformung
- PCB-Bogen
- Verpackungsaufbruch
- Dehnung der Lötstelle
- Überlastung der Befestigungselemente
- Verzerrungen auf dem Wohnungsmarkt
- Durchstich an scharfen Kanten
- Reduzierte endgültige Dielektrikumsdicke
Ein weiches Lager kann bei mäßiger Kraft eine hohe Dehnung aushalten. Ein festes Lager kann bei gleicher Dehnung die Baugruppe wesentlich stärker belasten. Der Kompressionsprozentsatz lässt sich ohne die Kraft-Durchbiegungs-Kurve nicht beurteilen.
Berechne das Kompressionsfenster
Die grundlegende Kompressionsgleichung lautet:
Stauchung (%) = (Lieferdicke – Einbaudicke) / Lieferdicke × 100
Führen Sie diese Berechnung unter folgender Adresse durch:
- Mindestabstand
- Nennspalt
- Maximaler Abstand
Vergleichen Sie anschließend jede Bedingung mit den Pressdaten des Lieferanten und der Kraftgrenze der Baugruppe. Der ausführliche Leitfaden von HAKTAK zu Kompressionsverhältnis des Wärmeleitpads behandelt diesen Prozess und die damit verbundenen dielektrischen Aspekte.
Die Härte und Anpassungsfähigkeit des Polsters können ein gutes Design zunichte machen

Die Wärmeleitfähigkeit wird in einem Datenblatt oft besonders hervorgehoben. Härte und Druckkraft werden vielleicht in einer kleinen Grafik ganz am Ende aufgeführt. Bei realen Produkten kann diese kleine Grafik darüber entscheiden, ob der Wärmepfad funktioniert.
Warum ein Hochleistungspad möglicherweise zu hart ist
Materialien mit hohem Füllstoffanteil können fester sein. Das ist nicht unbedingt schlecht. Ein festes Polster kann Formstabilität und eine einfachere Handhabung bieten.
Probleme treten auf, wenn das Produkt nicht genügend Druck aufbringen kann, um es zusammenzupressen.
Das Pad kann:
- Nur Oberflächenhöhen berühren
- Die Krümmung des Gehäuses wird nicht berücksichtigt
- Überlastung empfindlicher Bauteile
- Halten Sie einen Kühlkörper über ein anderes Gerät
- Je nach Drehmoment der Schraube unterschiedliche Ergebnisse erzielen
Die Shore-Härte ist für die Vorauswahl nützlich, beschreibt jedoch das Verhalten in der Baugruppe nicht vollständig. Zwei Lager mit ähnlichen Shore-00-Werten können unterschiedliche Spannungs-Dehnungs-Kurven aufweisen.
Ultraweiche Polster haben ihre eigenen Probleme
Die sehr weichen Polster passen sich bei geringem Druck gut an. Sie eignen sich besonders für empfindliche Bauteile und große Höhenunterschiede.
Dennoch kann weiches Material unpraktisch sein. Es kann:
- Dehnung beim Entfernen der Auskleidung
- An schmalen Stellen aufreißen
- Bewegung während der Montage
- Extrudieren unter hohem Druck
- Verwenden Sie nur Werkzeuge oder Handschuhe
- Verlust der Maßgenauigkeit bei Formen ohne Stützstrukturen
Die beste Wahl ist nicht einfach “weich” oder “hart” an sich. Es ist das Material, das innerhalb des zulässigen Kraftbereichs vollen Kontakt herstellt und während der gesamten Produktions- und Betriebsdauer stabil bleibt.
Schlechter Kontakt, Oberflächenebenheit und Montagetoleranz
Ein Wärmeleitpad kann sich nur bis zu einem gewissen Grad anpassen. Es kann weder unbegrenzte Verformungen des Gehäuses noch einen schrägen Kühlkörper oder ein falsch platziertes Befestigungselement beheben.
Raue, verzogene und schräge Oberflächen
Zu den häufigen Ursachen für ungleichmäßigen Kontakt zählen:
- Bearbeitungstoleranz für Kühlkörper
- Verformung des Gussgehäuses
- Verziehen von Leiterplatten
- Höhenunterschiede zwischen den Bauteilen
- Schwankungen in der Lötdicke
- Ungleichmäßige Dichtungskompression
- Unterschiedliche Wärmeausdehnung
- Ein Schraubenvorsprung, der als vorläufiger mechanischer Anschlag dient
Wenn sich eine Seite eines Polsters um 30% zusammenpresst und die andere Seite das Polster kaum berührt, ist die Temperaturverteilung ungleichmäßig.
Kontaktpapier, selbstklebende Folie, temporäres Referenzmaterial, 3D-Messung, Querschnittsanalyse oder eine kontrollierte Pad-Abdruck-Prüfung können dabei helfen, das Muster sichtbar zu machen. Jede Methode hat ihre Grenzen, daher sollte sie mit Bedacht eingesetzt werden.
Ein ungleichmäßiges Schraubendrehmoment kann die Schnittstelle aus dem Gleichgewicht bringen
Wenn man eine Ecke vollständig festzieht, bevor die anderen befestigt sind, kann sich der Kühlkörper neigen. Das ist in etwa so, als würde man ein Bein eines wackeligen Tisches festziehen und hoffen, dass die anderen drei von selbst mitziehen.
Eine gesteuerte Abfolge kann Folgendes umfassen:
- Alle Schrauben leicht aneinanderlegen
- Kreuzweise festziehen
- Drehmoment in zwei oder mehr Stufen aufbringen
- Verwendung kalibrierter Werkzeuge
- Erfassung des Enddrehmoments
- Anbringen mechanischer Anschläge, wo erforderlich
Das Drehmoment ist lediglich ein indirekter Maßstab für die Klemmkraft. Auch Reibung, der Zustand des Gewindes, die Bauart der Unterlegscheibe und die Steifigkeit des Gehäuses spielen eine Rolle.
Grundfläche des Pads und Fehlausrichtung
Ein zu kleines Kontaktstück kann dazu führen, dass ein Teil der Wärmequelle unbedeckt bleibt. Ein zu großes Kontaktstück kann zusätzlichen Druck auf Bereiche ausüben, die keine nutzbare Wärme übertragen.
Eine schlechte Geometrie kann außerdem folgende Probleme verursachen:
- Interferenz mit Schraubenvorsprüngen
- Umgeschlagene Kanten
- Material über Steckverbindern oder Messpunkten
- Enge Stellen, an denen beim Entfernen der Auskleidung Risse entstehen
- Probleme mit den elektrischen Abständen
- Mehrdeutigkeit bei der Platzierung von Operatoren
Ein gutes Stanzdesign sollte die erforderliche thermische Überlappung berücksichtigen und gleichzeitig realistische Platzierungstoleranzen zulassen.
Und ja, überprüfen Sie die Einlagen. Eine durchsichtige PET-Einlage kann überraschend schwer zu erkennen sein. Bleibt sie an Ort und Stelle, entsteht eine schlecht kontrollierbare Isolierschicht, die verhindert, dass sich das Polster an den Körper anpasst.
Warum Wärmeleitpads mit hohem W/mK-Wert dennoch versagen können
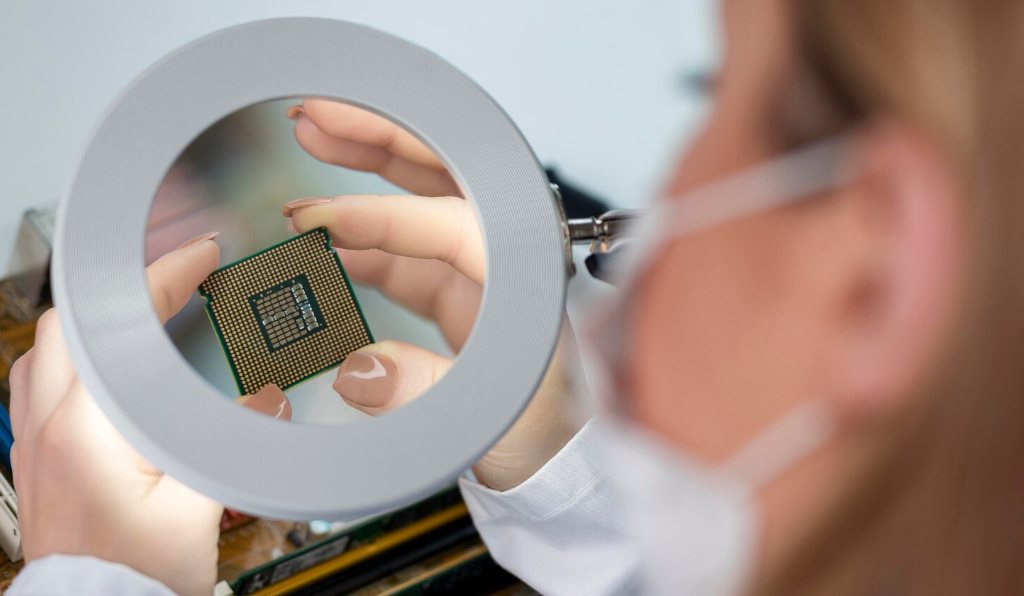
Die Wärmeleitfähigkeit beschreibt eine Materialeigenschaft. Sie gibt nicht direkt Auskunft über die Temperatur einer GPU, eines MOSFETs, eines Batteriemoduls, einer LED oder eines Controllers.
Die vollständige Schnittstelle umfasst:
- Gesamtwiderstand über das Pad
- Kontaktwiderstand an beiden Oberflächen
- Enddicke nach Verdichtung
- Effektive Kontaktfläche
- Wärmeverteilung im Bauteil und im Gehäuse
- Luftstrom, Flüssigkeitskühlung oder natürliche Konvektion, nachdem die Wärme die Grenzfläche verlassen hat
Die Dicke kann den Vorteil der Leitfähigkeit überwiegen
Zur Vereinfachung des Vergleichs wird der Kontaktwiderstand vernachlässigt: R = t / (k × A)
Bei gleicher Kontaktfläche:
- Eine 2,0 mm dicke Dämmplatte mit einem Dämmwert von 10 W/mK ergibt einen vereinfachten t/k-Wert von 0,20.
- Ein 0,8 mm dickes Dämmmaterial mit einem Wärmeleitkoeffizienten von 5 W/mK ergibt einen vereinfachten t/k-Wert von 0,16.
In diesem Beispiel weist das Pad mit der geringeren Leitfähigkeit einen niedrigeren Volumenwiderstand auf, da es wesentlich dünner ist. Da bei realen Grenzflächen auch Kontaktwiderstände auftreten, handelt es sich hierbei nicht um eine Produktbewertung. Dies soll vielmehr dazu dienen, daran zu erinnern, die gesamte Geometrie zu überprüfen.
Vergleich der thermischen Impedanz bei realistischen Drücken
Daten zur thermischen Impedanz können aussagekräftiger sein als W/mK, wenn die Prüfdicke, der Druck, die Temperatur und die Oberflächenbedingungen bekannt sind. Der Artikel von HAKTAK zum Thema Wärmeleitfähigkeit im Vergleich zur thermischen Impedanz erklärt, warum diese Bedingungen zusammen mit dem gemeldeten Wert übermittelt werden müssen.
Ein Kontaktstück, das unter hohem Labordruck getestet wurde, kann einen hervorragenden Eindruck machen. Dasselbe Material kann jedoch in einem leichten Kunststoffgehäuse mit geringer Klemmkraft eine schlechte Leistung erbringen.
Das ist auch der Grund, warum Ein hoher W/mK-Wert bedeutet nicht immer eine bessere Kühlleistung.. Die Bezeichnung ist zwar wichtig, aber die installierte Schnittstelle ist noch wichtiger.
Alterung von Wärmeleitpads, Druckverformungsrest und Kontaktverlust
Manche Fehler treten bereits am ersten Tag auf. Andere entwickeln sich erst nach und nach.
Ein Kontaktstück kann die anfänglichen thermischen Tests bestehen und dennoch nach thermischer Alterung, Temperaturwechselbeanspruchung, Vibration, chemischer Einwirkung oder jahrelanger Druckbelastung den Kontakt verlieren.
Druckverformungsrest
Der Druckverformungsrest ist die bleibende Verformung, die zurückbleibt, nachdem ein Werkstoff für eine bestimmte Zeit zusammengedrückt und anschließend wieder freigegeben wurde.
In einer Baugruppe kann ein hoher Druckverformungsrest zu Folgendem beitragen:
- Geringere Rückgewinnung
- Geringerer Anpressdruck
- Erhöhte Empfindlichkeit gegenüber Toleranzen oder Bewegungen im Gehäuse
- Höherer Wärmewiderstand
- Mangelhaftes Nachbearbeitungsverhalten
- Lokale Hotspots nach der Reifung
Das Problem ist nicht immer sichtbar. Das Polster bleibt zwar an seinem Platz, drückt aber möglicherweise nicht mehr fest gegen beide Oberflächen.
Eine Lockerung der Befestigungselemente und die Alterung der Dichtungen können dieses Problem noch verschlimmern. Es kann vorkommen, dass mehrere Bauteile im Stapel gleichzeitig an Festigkeit verlieren.
Aushärtung, Erweichung und chemische Veränderung
Eine längere Einwirkung von Hitze kann das Verhalten von Polymeren verändern. Die Art und das Ausmaß dieser Veränderung hängen von der Rezeptur ab.
Ein Pad kann:
- Härter werden
- Weicher werden
- Elastizität einbüßen
- Haftkraft der Oberfläche ändern
- Erhöhte Ölablassmenge anzeigen
- Schwellung nach Kontakt mit Flüssigkeit
- Verlust der Haftung an einem Trägermaterial oder einer Verstärkung
Werkstoffe, die mit Öl, Kraftstoff, Kühlmitteln, Reinigungsmitteln, Weichmachern oder Prozesschemikalien in Berührung kommen, müssen auf ihre Verträglichkeit mit der jeweiligen Flüssigkeit geprüft werden. Eine allgemeine Bezeichnung wie “chemikalienbeständig” ist für eine zuverlässige Konstruktion zu weit gefasst.
Temperaturwechsel und Leistungswechsel
Halbleitergehäuse, Kupfer, Aluminium, Leiterplattenlaminate, Lötzinn und Polymere dehnen sich unterschiedlich stark aus. Jeder Heiz- und Abkühlzyklus führt zu einer geringfügigen Verschiebung des Stapels.
Wiederholte Bewegungen können:
- Druckverteilung ändern
- Das Polster reiben oder scheren
- Kantenschaden erhöhen
- Befestigungselemente von Relax
- Eine kleine Kontaktfläche öffnen
- Ein schlecht sitzendes Polster verschieben
- Spannungskleber oder Verstärkungsschichten
Feste Beläge sind im Allgemeinen weniger anfällig für das klassische Auspumpen von Schmierfett. Durch mechanische Bewegungen und Druckverformungsrest können sie dennoch ihren wirksamen Kontakt verlieren.
Vibrationen und Stöße
Automobilelektronik, Industrieanlagen, Bahnsysteme, Telekommunikationsgeräte für den Außenbereich und mobile Geräte sind Vibrationen oder Stößen ausgesetzt.
Vibrationen können Folgendes aufdecken:
- Unzureichender Halt des Polsters
- Abrieb an scharfen Kanten
- Entspannung der Befestigungselemente
- Wohnungsbaubewegung
- Schwache Klebekraft
- Ein Entwurf mit nahezu keinem Kompressionsspielraum
Die Temperatur kann während eines kurzen Labortests stabil bleiben und erst nach Einwirkung von Umwelteinflüssen abweichen.
Ölaustritt, Verunreinigung, Delaminierung und Klebstoffversagen
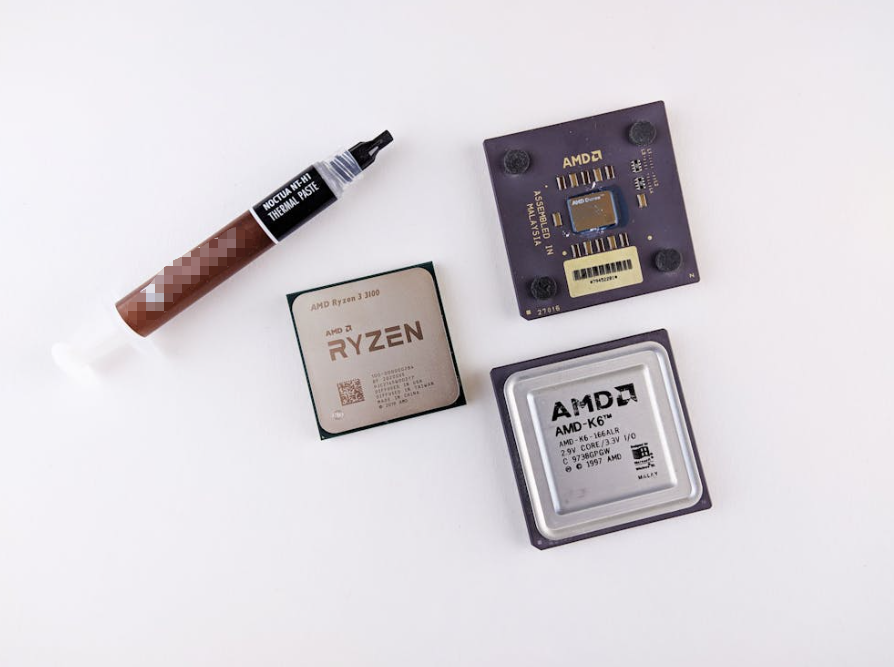
Nicht jeder Ausfall eines Wärmeleitpads ist auf ein einfaches Dickenproblem zurückzuführen.
Ist das Ablassen von Öl immer ein Fehler?
Bei einigen Polstern auf Silikonbasis kann es vorkommen, dass sich eine geringe Menge an Oberflächenöl oder niedermolekularem Material zeigt. Die zulässige Menge hängt von der Zusammensetzung und der Anwendung ab.
Eine geringfügige Leckage ist nicht automatisch ein Hinweis auf eine schlechte Wärmeübertragung. Allerdings kann die Migration in der Nähe folgender Stellen zu einem ernsthaften Problem werden:
- Elektrische Kontakte
- Relais
- Optische Baugruppen
- Kameras und Sensoren
- Konforme Beschichtungen
- Zu streichende oder zu verklebende Oberflächen
Die Abnahme sollte auf der Grundlage der Lieferantenvorgaben und Anwendungstests erfolgen und nicht auf einer schnellen visuellen Beurteilung beruhen.
Staub, Fingerabdrücke und Reinigungsrückstände
Weiche, klebrige Oberflächen ziehen Verunreinigungen an. Staub und Fasern können lokale Kontaktfehler verursachen. Öl, das bei der Handhabung entsteht, kann die Haftung beeinträchtigen. Aggressive Reinigungsrückstände können die Oberfläche verändern oder benachbarte Materialien angreifen.
Zu den guten Bedienelementen können gehören:
- Die Einlagen bis zur Montage an Ort und Stelle halten
- Halten der Pads an den Laschen oder Kanten der Einlage fest
- Verwendung sauberer Handschuhe oder Werkzeuge
- Schutz von Zuschnitten in versiegelten Verpackungen
- Steuerung der Reinigungschemikalien
- Gegebenenfalls Trennung von silikonfreien Materialien und mit Silikon verunreinigten Werkzeugen
Haftkleber kann eine weitere Versagensschicht bilden
Die selbstklebende Rückseite erleichtert das Anbringen, erhöht jedoch auch die Dicke und schafft eine weitere Schnittstelle.
Mögliche Probleme sind unter anderem:
- Klebstoffübertragung auf die Trägerfolie
- Uneinheitliche Haftung
- Beim Einbau eingeschlossene Luft
- Kantenanhebung
- Schlechte Haftung nach Hitzeeinwirkung oder Feuchtigkeit
- Rückstände bei der Nachbearbeitung
- Höherer Wärmewiderstand
Vollflächiger Klebstoff sollte nicht aus Gewohnheit aufgetragen werden. Bei manchen Konstruktionen können natürliche Haftkraft, selektiver Klebstoff, geteilte Trägerfolien oder mechanische Fixierung besser geeignet sein.
Verstärkung und Delaminierung von Laminaten
Die Pads können Glasfaser, PET, PEN, Graphit oder andere Trägerschichten enthalten. Die Verstärkung verbessert die Handhabung und die Durchstoßfestigkeit, allerdings entstehen durch den mehrschichtigen Aufbau mehr Grenzflächen.
Überprüfen Sie nach Hitzeeinwirkung, Feuchtigkeit, Kontakt mit Chemikalien oder wiederholter Biegung auf:
- Abstand zwischen den Schichten
- Blasen
- Rissige Kanten
- Falten
- Exposition des Trägers
- Verlust der elektrischen Isolierung
Die Ausfallarten von Wärmeleitpads variieren je nach Material
Der Begriff “Wärmeleitpad” umfasst mehrere Materialgruppen. Die damit verbundenen Risiken sind nicht identisch.
| Materialfamilie | Typische Festigkeit | Bedenken hinsichtlich eines möglichen Ausfalls | Nützliche Maßnahmen zur Risikominderung |
| Silikon-Abstandsstück | Sanfte Spaltenfüllung, Dämpfung und Isolierung | Dauerverformung, Ausbluten, Reißfestigkeit, Siloxanempfindlichkeit | Anforderungen hinsichtlich Härte, Druck und Alterung erfüllen |
| Silikonfreies Polster | Geeignet für den Einsatz in der Nähe von empfindlichen Kontakten, Optiken oder Beschichtungen | Unterschiedliche Steifigkeit, Alterung des Klebstoffs, Feuchtigkeitsverhalten | Überprüfung der Verunreinigung und des mechanischen Verhaltens |
| Fluorsilikon-Polster | Bessere Beständigkeit gegenüber vielen Ölen und Kraftstoffen | Höhere Kosten und flüssigkeitsspezifische Kompatibilität | Testen Sie die tatsächliche Flüssigkeitsmenge, Temperatur und Dauer |
| Graphitplatte oder -kissen | Dünne Wärmeverteilung in der Ebene | Faltenbildung, Risse, Leitfähigkeit an den Kanten, schlechte Füllung großer Lücken | Kanten schützen und bei Bedarf isolieren |
| Phasenwechsel-Pad | Dünne Grenzschicht mit verbesserter Benetzung im heißen Zustand | Aktivierungsfehlanpassung, Bewegung der Beschichtung, schlechter Kaltkontakt | Test der Inbetriebnahme, der Zyklen und der Betriebstemperatur |
| Thermischer Kitt | Gleicht unterschiedliche Bauteilhöhen aus | Schwankungen im Ausbringungsvolumen, Rückstände und Bewegung | Kontrolle von Masse, Platzierung und endgültigem Abstand |
| Flüssiger Spaltfüller | Füllt komplexe Geometrien bei geringer Montagebeanspruchung aus | Hohlraumfüllung, Mischen, Aushärtung, Nachbearbeitung und chemiespezifische Bewegungen | Überwachung des Dosier- und Aushärtungsprozesses |
Für herkömmliche komprimierbare Plattengrenzflächen bietet HAKTAK’s Sortiment an Silikon-Wärmeauflagen bietet verschiedene Optionen hinsichtlich Dicke, Härte, Klebkraft, dielektrischer Eigenschaften und kundenspezifischer Stanzformate.
Wenn die Höhen der Bauteile für eine bestimmte Blechdicke zu stark variieren, Auswahl zwischen Wärmeleitpaste und Wärmeleitpad wird relevant. Ein entbehrliches wärmeleitender Spaltfüller kann zudem die Montagebelastung bei komplexen oder großflächigen Schnittstellen verringern.
Die Alternative muss noch überprüft werden. Durch den Wechsel der Werkstofffamilien wird lediglich eine Reihe von Risiken durch eine andere ersetzt; der technische Aufwand entfällt dadurch nicht.
Ausfälle von Wärmeleitpads nach Anwendungsbereich und Branche
Die physikalischen Grundprinzipien gelten zwar branchenübergreifend, doch die wichtigste Fehlerart ändert sich je nach Produkt.
GPUs, KI-Server und Hochleistungsbeschleuniger
Bei diesen Baugruppen können Kühlpads an Speicherbausteinen, Leistungsstufen, Controllern und Wärmeverteilern zum Einsatz kommen. Oft teilen sich mehrere Komponenten eine Kühlplatte.
Zu den wichtigsten Risiken zählen:
- Falsche Ersatzdicke
- Harte Polster, die die Kühlplatte von einem GPU- oder Beschleuniger-Gehäuse abheben
- Unvollständige VRAM-Abdeckung
- Ungleichmäßiges Schraubendrehmoment
- Servicetechniker, die verschiedene Dicken kombinieren
- Ein hoher lokaler Wärmefluss, der sich hinter einer akzeptablen Durchschnittstemperatur verbirgt
Überwachen Sie die Temperaturen von Motorblock, Hotspot, Speicher, Einlass und Kühlmittel, sofern diese Messwerte verfügbar sind. Ein einzelner Sensor reicht nicht aus, um ein vollständiges Bild zu erhalten.
MOSFETs, IGBTs und Leistungsmodule
In der Leistungselektronik müssen an derselben Schnittstelle häufig sowohl Wärmeübertragung als auch elektrische Isolierung gewährleistet sein.
Achten Sie auf:
- Durchstich an den Kanten der Verpackung
- Verringerte Dielektrikumsdicke nach Kompression
- Hohe Klemmkraft
- Ebenheit des Kühlkörpers
- Bewegung beim Ein- und Ausschalten
- Lokaler Druck um die Schrauben herum
Elektrische Prüfungen sollten nicht nur an neuem Material, sondern auch nach mechanischer und umweltbedingter Beanspruchung wiederholt werden.
EV-Batterien und BMS-Elektronik
Batteriesysteme können über große Schnittstellen, mehrere Höhenebenen, flexible Einschübe und strenge Belastungsgrenzen verfügen.
Zu den häufigsten Fehlerursachen gehören:
- Hohe Gesamtdruckkraft
- Bestückung von Zellen oder Leiterplatten
- Kontakt mit Kühlmittel
- Abweichungen über ein großes Gebiet hinweg
- Vibration
- Bewegung der Baugruppe über die gesamte Lebensdauer hinweg
Ein Material, das anhand eines kleinen Teststücks ausgewählt wurde, kann sich in einem großen Batteriemodul anders verhalten.
Steuergeräte für Kraftfahrzeuge und ADAS-Module
Gehäuse für die Automobilindustrie sind Temperaturwechseln, Vibrationen, Feuchtigkeit, Ölen, Reinigungsmitteln und langen Qualifizierungsphasen ausgesetzt.
Hier kommt es auf die Rückverfolgbarkeit an. Ein Produktionsfehler kann auf eine Materialcharge, eine Änderung des Gehäuses, eine Abweichung des Schraubendrehmoments oder ein neues Verfahren zur Auskleidung zurückzuführen sein. Bei der Ursachenanalyse sollten alle vier Möglichkeiten berücksichtigt werden.
LED-Module
Die Zuverlässigkeit von LEDs hängt stark von der Temperatur ab. Unter Leiterplatten mit Metallkern, Treibern oder Gehäusen können Dämpfungsplatten oder Isolierfolien angebracht sein.
Ein ungleichmäßiger Kontakt zur Leiterplatte kann zu lokalen Überhitzungsstellen führen, selbst wenn die Gehäusetemperatur auf den ersten Blick im normalen Bereich liegt. Auch optische Verunreinigungen und eine längere Wärmeeinwirkung können die Materialauswahl beeinflussen.
Telekommunikation, Industrie und Außenelektronik
Diese Produkte können in geschlossenen oder teilweise geschlossenen Gehäusen im Dauerbetrieb eingesetzt werden.
Zu den relevanten Bedenken gehören:
- Luftfeuchtigkeit
- Staub
- Anhaltend hohe Temperatur
- Verzerrung durch das Gehäuse
- Lange Wartungsintervalle
- Eingeschränkter Zugang für Wartungsarbeiten
Ein kostengünstiger Austausch des Messpads kann zu einem teuren Einsatz vor Ort werden. Die langfristige Validierung ist wichtiger als die Zeitersparnis von ein paar Minuten im Labor.
So finden Sie die Ursache für den Ausfall eines Wärmeleitpads
Ein sofortiger Austausch des Pads könnte die Spuren verwischen. Ein kontrollierter Arbeitsablauf ist sinnvoller.
Schritt 1: Überprüfen Sie das thermische Symptom
Vergleichen Sie das Gerät unter einheitlichen Bedingungen:
- Umgebungs- und Einlasstemperatur
- Leistung oder Arbeitsaufwand
- Lüfter- oder Pumpendrehzahl
- Firmware und Steuerungseinstellungen
- Sauberkeit des Kühlkörpers
- Sensorposition
- Testdauer
Ein verschmutzter Kühlkörper oder eine veränderte Lüfterkennlinie können wie ein Defekt des Kühlkörpers aussehen.
Schritt 2: Den Kühlweg darstellen
Schreibe den Pfad auf:
Komponente -> thermisch Polster -> Verteiler oder Gehäuse -> Kühlkörper -> Luft oder Kühlmittel
Markieren Sie jeden Kontaktpunkt und jeden möglichen Engpass. Das Pad ist möglicherweise nicht der größte Widerstand.
Schritt 3: Kontaktnachweise prüfen
Machen Sie vor der Reinigung der Baugruppe ein Foto:
- Position des Polsters
- Druckspuren
- Abdruck der Kernpaste
- Eingerissene oder gefaltete Kanten
- Öl oder Rückstände
- Zustand der Auskleidung
- Schraubenpositionen
- Bereiche ohne sichtbaren Kontakt
Ein schlechter Pastenabdruck auf einem benachbarten Chip ist ein deutlicher Hinweis darauf, dass sich die Dicke oder Steifigkeit der Kontaktflächen im Stapel verändert hat.
Schritt 4: Messen Sie die tatsächliche Gesamtdicke
Messen oder berechnen:
- Mindest-, Nenn- und Maximalabstand
- Dicke des mitgelieferten Polsters
- Dicke im komprimierten Zustand
- Höhe der Komponente
- Ebenheit des Gehäuses und des Kühlkörpers
- PCB-Bogen
Vermeiden Sie es, ein weiches, gebrauchtes Pad mit unkontrolliertem Fingerdruck zu messen. Der gemessene Wert kann zwar sehr präzise sein und dennoch falsch sein.
Schritt 5: Kraft und Befestigung überprüfen
Überprüfen:
- Schraubendrehmoment
- Anzugsreihenfolge
- Klammer oder Federkraft
- Zustand des Gewindes
- Mechanische Anschläge
- Wechselwirkung der Dichtungen
- Gesamtfläche der Polster
Eine Änderung des Drehmoments kann sich sowohl auf den thermischen Kontakt als auch auf die Belastung der Leiterplatte auswirken.
Schritt 6: Ursachenkategorien trennen
| Interessengruppe | Beispiele |
| Material | Falsche Güteklasse, Härteabweichung, Verunreinigung, Alterung, beschädigte Auskleidung |
| Design | Falscher Abstand, unzureichende Anordnung der Klemmen, schlechte Ebenheit, geringe dielektrische Sicherheitsmarge |
| Prozess | Fehlplatzierung, nicht entfernte Auskleidung, unterschiedliche Dicke, Drehmomentschwankungen |
| Umwelt | Hitze, Vibrationen, Feuchtigkeit, Öl, Kühlmittel, Reinigungschemikalien |
Durch diese Trennung wird verhindert, dass jedes Problem zu einer Lieferantenreklamation wird, bevor die Baugruppe geprüft wurde.
Schritt 7: Ändern Sie jeweils nur eine Variable
Ändern Sie nicht gleichzeitig die Marke der Wärmeleitpads, deren Dicke, die Wärmeleitpaste, das Anzugsmoment der Schrauben, die Lüfterkennlinie und den Kühlkörper. Die Temperaturwerte könnten sich zwar verbessern, der Grund dafür bliebe jedoch unbekannt.
Verwenden Sie nach Möglichkeit kontrollierte A/B-Proben.
Schritt 8: Überprüfen Sie die Korrektur nach der Belastung
Eine Korrekturmaßnahme sollte bestehen bleiben:
- Wärmealterung
- Temperaturwechsel
- Aus- und Wiedereinschalten
- Vibration
- Feuchtigkeit oder Kontakt mit Flüssigkeiten, sofern zutreffend
- Wiederzusammenbau oder Wartungsarbeiten
Die Anfangstemperatur ist erforderlich. Sie ist kein Beweis für die Lebensdauer.
Prüfnormen und Zuverlässigkeitsprüfungen für Wärmeleitpads
Es gibt keinen einzelnen Test, der die gesamte Schnittstelle des Wärmeleitpads zertifiziert.
ASTM D5470 für die thermische Impedanz
ASTM D5470-17(2024) befasst sich mit der Messung der thermischen Impedanz im stationären Zustand und der Berechnung der scheinbaren Wärmeleitfähigkeit von wärmeleitenden elektrischen Isoliermaterialien.
Die Methode ist zwar nützlich, doch wird in der Norm selbst darauf hingewiesen, dass die idealisierten Prüfbedingungen nicht direkt mit den meisten Anwendungsfällen übereinstimmen. Druck, Dicke, Temperatur, Probenfläche und Oberflächenbeschaffenheit sollten zusammen mit dem Ergebnis angegeben werden.
Härte und Druckverformungsrest
Die Norm ASTM D2240 wird üblicherweise zur Bestimmung der Durometer-Härte herangezogen. Die Norm ASTM D395 befasst sich mit dem Druckverformungsrest von Gummimaterialien.
Diese Eigenschaften ermöglichen zwar einen Materialvergleich, ersetzen jedoch weder eine vollständige Kraft-Durchbiegungs-Kurve noch eine Validierung unter realen Bedingungen. Ein kleines Teststück im Labor kann nicht erkennen, dass eine echte Leiterplatte dünn und verzogen ist und durch vier Schrauben belastet wird.
Umweltprüfungen
Die Verfahren der Norm IEC 60068 werden häufig zur Gestaltung von Prüfungen hinsichtlich Temperaturwechsel, Vibration, Stoßbelastung, feuchter Hitze und damit zusammenhängender Umweltprüfungen herangezogen.
Das genaue Profil sollte zum Produkt passen. Fünf schonende Zyklen reichen nicht aus, um die Eignung für ein Automobilmodul nachzuweisen, von dem erwartet wird, dass es jahrelangen wiederholten thermischen und mechanischen Belastungen standhält.
Anforderungen an die Entflammbarkeit und die dielektrischen Eigenschaften
Die UL 94-Klassifizierungen beschreiben das Entzündungsverhalten von Werkstoffen unter definierten Testbedingungen. Sie sind kein Nachweis für eine geringe thermische Impedanz, Druckstabilität oder elektrische Isolierung in einer komprimierten und gealterten Baugruppe.
Bei der dielektrischen Prüfung sollte Folgendes berücksichtigt werden:
- Enddicke nach Verdichtung
- Kantengeometrie
- Pannengefahr
- Luftfeuchtigkeit und Verunreinigungen
- Thermische Alterung
- Mechanisches Radfahren
Die gesamte Baugruppe testen
Offiziell AMD-Leitlinien für Wärmeleitmaterialien legt den Schwerpunkt auf die Verteilung, den zunehmenden Druck und die Beseitigung von Luftspalten. Diese Faktoren erklären, warum die Materialdaten mit der tatsächlichen Kühlbaugruppe verknüpft werden müssen.
Die Zuverlässigkeit sollte auch die thermische Leistung nach der Einwirkung messen und nicht lediglich bestätigen, dass das Pad sichtbar bleibt. A Zuverlässigkeitsbericht zu Gap-Pads von Parker Chomerics veranschaulicht diesen Ansatz, indem die thermische Impedanz während der Phasen des Thermoschocks, der Temperaturwechselbeanspruchung und der Vibration verfolgt wird.
Eine umfassendere Übersicht über Prüfverfahren finden Sie im Leitfaden von HAKTAK zu Gängige TIM-Prüfstandards erläutert, warum neben dem Wert auch die Methode und die Testbedingungen angegeben werden müssen.
Häufige Ursachen für den Ausfall von Wärmeleitpads und entsprechende Lösungen
| Fehlerursache | Typische Beweise | Korrekturmaßnahme |
| Das Polster ist zu dünn | Kaum oder gar keine Abdrücke bei maximalem Spalt | Erhöhen Sie die Dicke oder verwenden Sie ein Material, das sich besser an die Lücke anpasst |
| Das Polster ist zu dick | Hohe Kraft, Extrusion oder Kontaktverlust an anderer Stelle | Dicke verringern und das Kompressionsfenster neu berechnen |
| Das Polster ist zu hart | Schwacher Oberflächenkontakt unter der aufgebrachten Last | Wählen Sie einen niedrigeren Elastizitätsmodul oder passen Sie die Konstruktion der Klemme an |
| Übermäßige Kompression | Bogen der Leiterplatte, Herausdrücken der Polsterung oder verringerte Isolationsreserve | Mechanische Anschläge hinzufügen, die Dicke verringern oder die Kraft reduzieren |
| Ungleichmäßiges Drehmoment | Einseitiger Abdruck oder Hotspot in einer Ecke | Drehmoment, Werkzeuge und Anzugsreihenfolge festlegen |
| Mangelnde Ebenheit | Ungleichmäßige Kompression über das Polster hinweg | Das Design von Gehäuse, Kühlkörper oder Halterung verbessern |
| Verlegung | Ein Teil der Wärmequelle bleibt unbedeckt | Ausrichtungsfunktionen, Tabulatoren oder visuelle Prüfungen hinzufügen |
| Druckverformungsrest | Die Temperatur steigt nach der Betriebszeit an | Die gealterte Rückgewinnung qualifizieren und eine stabilere Güteklasse auswählen |
| Chemische Unverträglichkeit | Quellung, Erweichung, Verhärtung oder Rückstände | Testen Sie die tatsächlichen Flüssigkeiten und passen Sie die Materialzusammensetzung an |
| Kontamination | Schlechter Kontakt, Haftungsverlust oder elektrisches Problem | Verbesserung der Kontrollmaßnahmen bei Verpackung, Reinigung und Handhabung |
| Problem mit dem Klebstoff oder der Trägerfolie | Dehnung, Rückstände, Blasen oder Kantenabhebung | Einlage, Heftniveau, Klebemuster oder Montageverfahren ändern |
| Falsche TIM-Familie | Ein Pad kann der Lücke oder der Bewegung nicht folgen | Putty, Gel, PCM, Graphit oder flüssige Spaltfüller prüfen |
Wann sollte das Pad ausgetauscht und wann die Benutzeroberfläche neu gestaltet werden?
Wechseln Sie das Polster aus, wenn:
- Zerrissen
- Gefaltet
- Durchstochen
- Kontaminiert
- Dauerhaft verformt
- Fehlende Identifikation
- Falsche Güteklasse oder Dicke
- Aus einer Baugruppe entfernt, ohne dass ein genehmigtes Verfahren zur Wiederverwendung vorliegt
Die Benutzeroberfläche sollte in folgenden Fällen neu gestaltet werden:
- Keine einzelne Polsterdicke deckt den gesamten Toleranzbereich ab.
- Die erforderliche Kompression führt zu einer Überlastung der Leiterplatte oder des Bauteils.
- Der Kühlkörper bleibt schräg oder ist verzogen.
- Zur Behebung eines baulichen Problems wird eine Unterlage verwendet.
- Nach wiederholtem Austausch der Pads treten die Ausfälle im Feld erneut auf.
- Die Schnittstelle erfordert sowohl eine sehr geringe Belastung als auch eine hohe Spaltabdeckung.
Das wiederholte Auswechseln der Bremsbeläge bei einem mechanisch defekten Bremssystem ist so, als würde man neue Reifen auf eine verbogene Felge montieren. Das neue Teil mag zwar eine Zeit lang Abhilfe schaffen, doch das zugrunde liegende Problem bleibt weiterhin bestehen.
Schlussfolgerung
Wärmeleitpads versagen selten aufgrund eines einzigen Wertes im Datenblatt. Sie versagen vielmehr als Teil eines Schnittstellensystems.
Eine falsche Dicke kann zu einem Luftspalt führen oder einen gemeinsam genutzten Kühlkörper vom anderen Chip abheben. Eine unzureichende Anpresskraft kann den Kontakt beeinträchtigen. Eine zu starke Anpresskraft kann das Kontaktpad, die Leiterplatte, das Bauteil oder den dielektrischen Pfad beschädigen. Alterung, Vibrationen, Chemikalien, Verunreinigungen, Klebstoffe und Abweichungen bei der Montage können dann zu Veränderungen an einem Design führen, das am ersten Tag noch einwandfrei aussah.
Die praktische Lösung besteht darin, den gesamten Wärmepfad zu überprüfen. Messen Sie den tatsächlichen Spalt. Überprüfen Sie die minimale, nominale und maximale Kompression. Überprüfen Sie die Härte und die Kraft. Untersuchen Sie die Anzeichen für Kontakt. Kontrollieren Sie die Positionierung und das Drehmoment. Testen Sie anschließend die thermische, mechanische und elektrische Leistung nach einer realistischen Umgebungsbelastung.
Das beste Wärmeleitpad ist nicht einfach das mit dem höchsten W/mK-Wert. Es ist dasjenige, das über die gesamte vorgesehenen Lebensdauer hinweg einen zuverlässigen Kontakt gewährleistet, ohne das Produkt zu überlasten.
Häufig gestellte Fragen
Was sind die Anzeichen für ein defektes Wärmeleitpad?
Zu den typischen Anzeichen zählen steigende Bauteil-Temperaturen, thermische Drosselung, hohe Lüfterdrehzahlen, Temperaturunterschiede zwischen den einzelnen Einheiten, schlechte Kontaktstellen, Risse, Einrisse, Verhärtungen, Extrusion, Ölwanderung oder Elastizitätsverlust. Diese Symptome können auch auf eine falsche Dicke, mangelhafte Befestigung, Staub, Luftströmung oder Probleme mit dem Kühlkörper zurückzuführen sein, weshalb das gesamte Kühlsystem überprüft werden sollte.
Können Wärmeleitpads zu einer Überhitzung führen?
Ja. Ein Wärmeleitpad kann zu einer Überhitzung führen, wenn es zu dünn ist, um einen guten Kontakt herzustellen, zu dick, um in den Stapel zu passen, zu hart, um zusammengedrückt zu werden, falsch positioniert, verunreinigt oder mit noch angebrachter Schutzfolie montiert ist. Dicke oder feste Wärmeleitpads können zudem dazu führen, dass sich eine gemeinsam genutzte Kühlplatte vom CPU- oder GPU-Chip abhebt.
Was passiert, wenn ein Wärmeleitpad zu dick ist?
Ein zu dickes Wärmeleitpad kann den Wärmewiderstand und die Montagekraft erhöhen. Es kann die Leiterplatte verbiegen, Bauteile belasten, an den Rändern herausquellen, die dielektrische Dicke verringern oder verhindern, dass ein benachbartes Bauteil den Kühlkörper berührt. Dies kann zu schlechteren Temperaturwerten führen, selbst wenn das neue Wärmeleitpad eine höhere Leitfähigkeit aufweist.
Was passiert, wenn ein Wärmeleitpad zu dünn ist?
Ein zu dünnes Polster berührt möglicherweise nicht beide Oberflächen, insbesondere bei maximalem Produktionsspalt. Dadurch entstehen isolierende Lufttaschen und Hotspots. Außerdem kann der Kontakt bei Vibrationen oder Temperaturwechselbeanspruchungen zeitweise unterbrochen werden.
Wie stark sollte sich ein Wärmepad zusammenpressen?
Es gibt keinen allgemeingültigen Kompressionsprozentsatz für jedes Bremsbelag. Der richtige Wert hängt von der Dicke, der Härte, dem Kraft-Durchbiegungs-Verhalten, der Oberflächenebenheit, der Bremsbelagfläche, der Spalttoleranz und den Belastungsgrenzen des Bauteils ab. Die Kompression sollte bei minimalem, nominalem und maximalem Spalt berechnet und mit den Angaben des Lieferanten verglichen werden.
Verlieren Wärmepads mit der Zeit an Wirksamkeit?
Das ist möglich. Hitze, Druckverformungsrest, Temperaturwechselbeanspruchung, Vibration, Feuchtigkeit, chemische Einwirkung und die Entspannung von Befestigungselementen können den Kontakt beeinträchtigen oder das Materialverhalten verändern. Ein Kontaktpad kann optisch intakt bleiben, während sich sein thermischer Widerstand im eingebauten Zustand erhöht.
Ist Öl, das aus einem Kühlkörper austritt, ein Anzeichen für einen Defekt?
Nicht immer. Ein geringes Ausbluten kann von der Zusammensetzung abhängen. Eine übermäßige Migration kann dennoch Kontakte, Optiken, Beschichtungen oder Klebeflächen verunreinigen. Die Abnahme sollte auf der Grundlage der Lieferantengrenzwerte sowie thermischer, elektrischer und Kontaminationsprüfungen für die jeweilige Anwendung erfolgen.
Können zwei Wärmeleitpads übereinandergelegt werden?
Durch das Übereinanderlegen entsteht eine zusätzliche Schnittstelle, an der Luft, Fehlausrichtung und Kontaktwiderstand auftreten können. Außerdem wird dadurch die Kompression weniger vorhersehbar. In der Regel wird ein einzelnes, richtig ausgewähltes Polster bevorzugt. Das Übereinanderlegen sollte nur dann angewendet werden, wenn der Lieferant und die Produktvalidierung dies unterstützen.
Kann ein entferntes Wärmeleitpad wiederverwendet werden?
Die Wiederverwendung ist grundsätzlich mit Risiken verbunden. Ein ausgebautes Polster kann Risse aufweisen, verunreinigt, gedehnt oder dauerhaft zusammengedrückt sein. Seine endgültige Dicke und sein Druck lassen sich möglicherweise nicht mehr reproduzieren. Für Produktionsanlagen, Hochleistungsgeräte und ausfallsichere Anlagen sollte in der Regel ein neues, spezifikationsgemäßes Polster verwendet werden.
Warum sind die GPU-Temperaturen nach dem Austausch der Wärmeleitpads gestiegen?
Die Ersatzpads weisen möglicherweise eine falsche Dicke, Härte oder Position auf. Sie könnten den Kühler vom GPU-Chip fernhalten oder keinen Kontakt zu den Speicher- und Stromversorgungskomponenten herstellen. Überprüfen Sie den Abdruck der Wärmeleitpaste, die Druckstellen der Pads, die Reihenfolge der Schrauben, alle Schutzfolien sowie die genauen ursprünglichen Dickenvorgaben, bevor Sie ein anderes Material ausprobieren.

